How to Create a Clipping Path in Photoshop
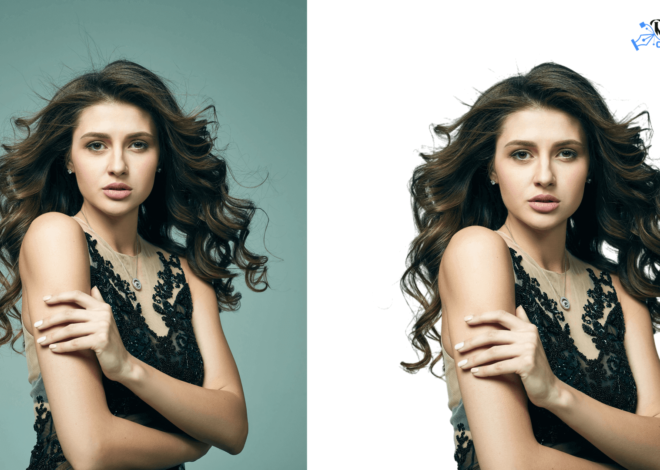
Creating a clipping path in Photoshop is a useful technique to isolate an object from the background. This technique is often used by photo editors to manipulate the background or remove a solid object from the image. In this article, we will guide you through the process of creating a clipping path in Photoshop Welcome to the world of Photoshop! Today, we’re going to learn a cool trick: how to remove backgrounds from pictures. Don’t worry if you’re new to this – we’ll go step by step using simple words. By the end, you’ll be a pro at making pictures look awesome!
What’s a Clipping Path?
Sure thing! Imagine a clipping path as a magical tool in your computer that helps you cut out exactly what you want from a picture. It’s like having a superhero that can neatly separate things in a photo. So, if you want to take out the background of a picture or focus on a particular thing, a clipping path is your go-to friend! It’s all about making your photos look super cool and clean. Just think of it as a special way to highlight and keep the parts of a picture you really like!
Getting Friendly with Photoshop
First things first – you need to have Photoshop on your computer. But don’t stress, using it is easy! We’ll show you around – from opening a picture to understanding the tools. Get to know the basics, and you’ll be all set to make your photos look amazing.
What is the difference between a clipping path and a mask in photoshop
A clipping path and a mask in Photoshop are both techniques used to isolate a subject from its background, but they differ in their methods and best use cases.
Absolutely! A clipping path is like a guide or outline that helps you neatly trim out a part of a flat picture. Instead of thinking about it as a path or shape, imagine it as a friendly border that assists you in cutting precisely around the edges of a 2D image. It’s your virtual scissors for making clean and tidy cutouts in the digital world!
. It is created using the Pen Tool in Photoshop to draw around the object that you want to isolate. Anything inside the path will be included after the clipping path is applied, and anything outside the path will be omitted from the output. Clipping paths are best used for images with sharp, hard, or straight edges. They provide a very precise and clean cutout, especially for images with less complex shapes. On the other hand, a mask in Photoshop, also known as image masking, is a technique that involves the use of a pixel-based layer to control the visibility of an image.
Certainly! In Photoshop, you’ll find two kinds of masks: layer masks and clipping masks. These masks act like invisible helpers, letting you control which parts of your picture show up and which stay hidden. It’s like having secret agents for your images! Layer masks and clipping masks each have their own superpowers, making them handy tools for creating awesome edits. Let’s dive in and explore how these masks can add a touch of magic to your pictures.
Layer masks use black and white to reveal or hide parts of the layer, while clipping masks use the content and transparency of one layer to control the visibility of another. Masks are best used for images with complex edges, numerous turns, or intricate details. They can handle soft edges and varying levels of transparency better than clipping paths. In summary, while both clipping paths and masks can be used to isolate subjects from their backgrounds, the choice between the two depends on the complexity of the image. Clipping paths are best for less complex images with hard edges, while masks are better for more complex images with soft or intricate edges.
Steps to Create a Clipping Path in Photoshop
Step 1: Open the Image
First, open the Photoshop software and upload the photo you will edit by clicking on File > Open.
Step 2: Select the Pen Tool
After uploading the image to Photoshop, proceed to select the Pen Tool. You can spot it in the Toolbar.
Step 3: Create Anchor Points
The process is simple, you just need to pick the pen tool and start marking around the image.
Step 4: Adjust the Clipping Path Settings
Adjust control handles as needed to maintain the desired curvature.
Step 5: Use ‘Ctrl + Enter’ for Selection
For selecting the clipping path that you have created, use the shortcut ‘Ctrl + Enter‘.
Step 6: Use ‘Select > Modify > Feather’ or ‘Shift+F6’ for Smoothness
Apply 0.5 feathers for smoother edges. Go to ‘select from the above menu, then ‘modify,’ and then select ‘feather.’ You can also use the shortcut Shift + F6.
Step 7: Save Your Path
Once you’re happy with the path you’ve created, go to your Paths panel and save your path.
Step 8: Create a Clipping Path
To create a traditional clipping path, simply click on the saved path you just created in your Paths panel. Click on the panel menu again and choose Clipping Path
Frequently Asked Questions (FAQ):
Q1: Why do I need to remove backgrounds in Photoshop?
A1: Taking out backgrounds helps make your pictures look cleaner. It’s like magic to make your subject stand out!
Q2: Is this guide for Photoshop beginners?
A2: Absolutely! This guide is for everyone – even if you’re just starting with Photoshop.
Q3: Can I use other tools besides the Pen Tool?
A3: Yep! While the Pen Tool is cool, Photoshop has other tools like the Magic Wand. They’re like different superpowers for different jobs.
More : Top Ecommerce Photo Editing Services Company
Conclusion :
Awesome job! You made it through our easy guide on removing backgrounds in Photoshop. Now you know how to use the magic tools to make your photos look fantastic. Remember, practice makes perfect, so keep trying! Whether you’re new to this or already love playing with pictures, have fun making your images stand out. Happy editing!