Types of Masking in Photoshop
Masking in Photoshop is a powerful tool that allows you to hide or reveal parts of an image without permanently altering it. This guide will help you understand how to use masks in Photoshop with easy steps and clear explanations.
What is Masking?
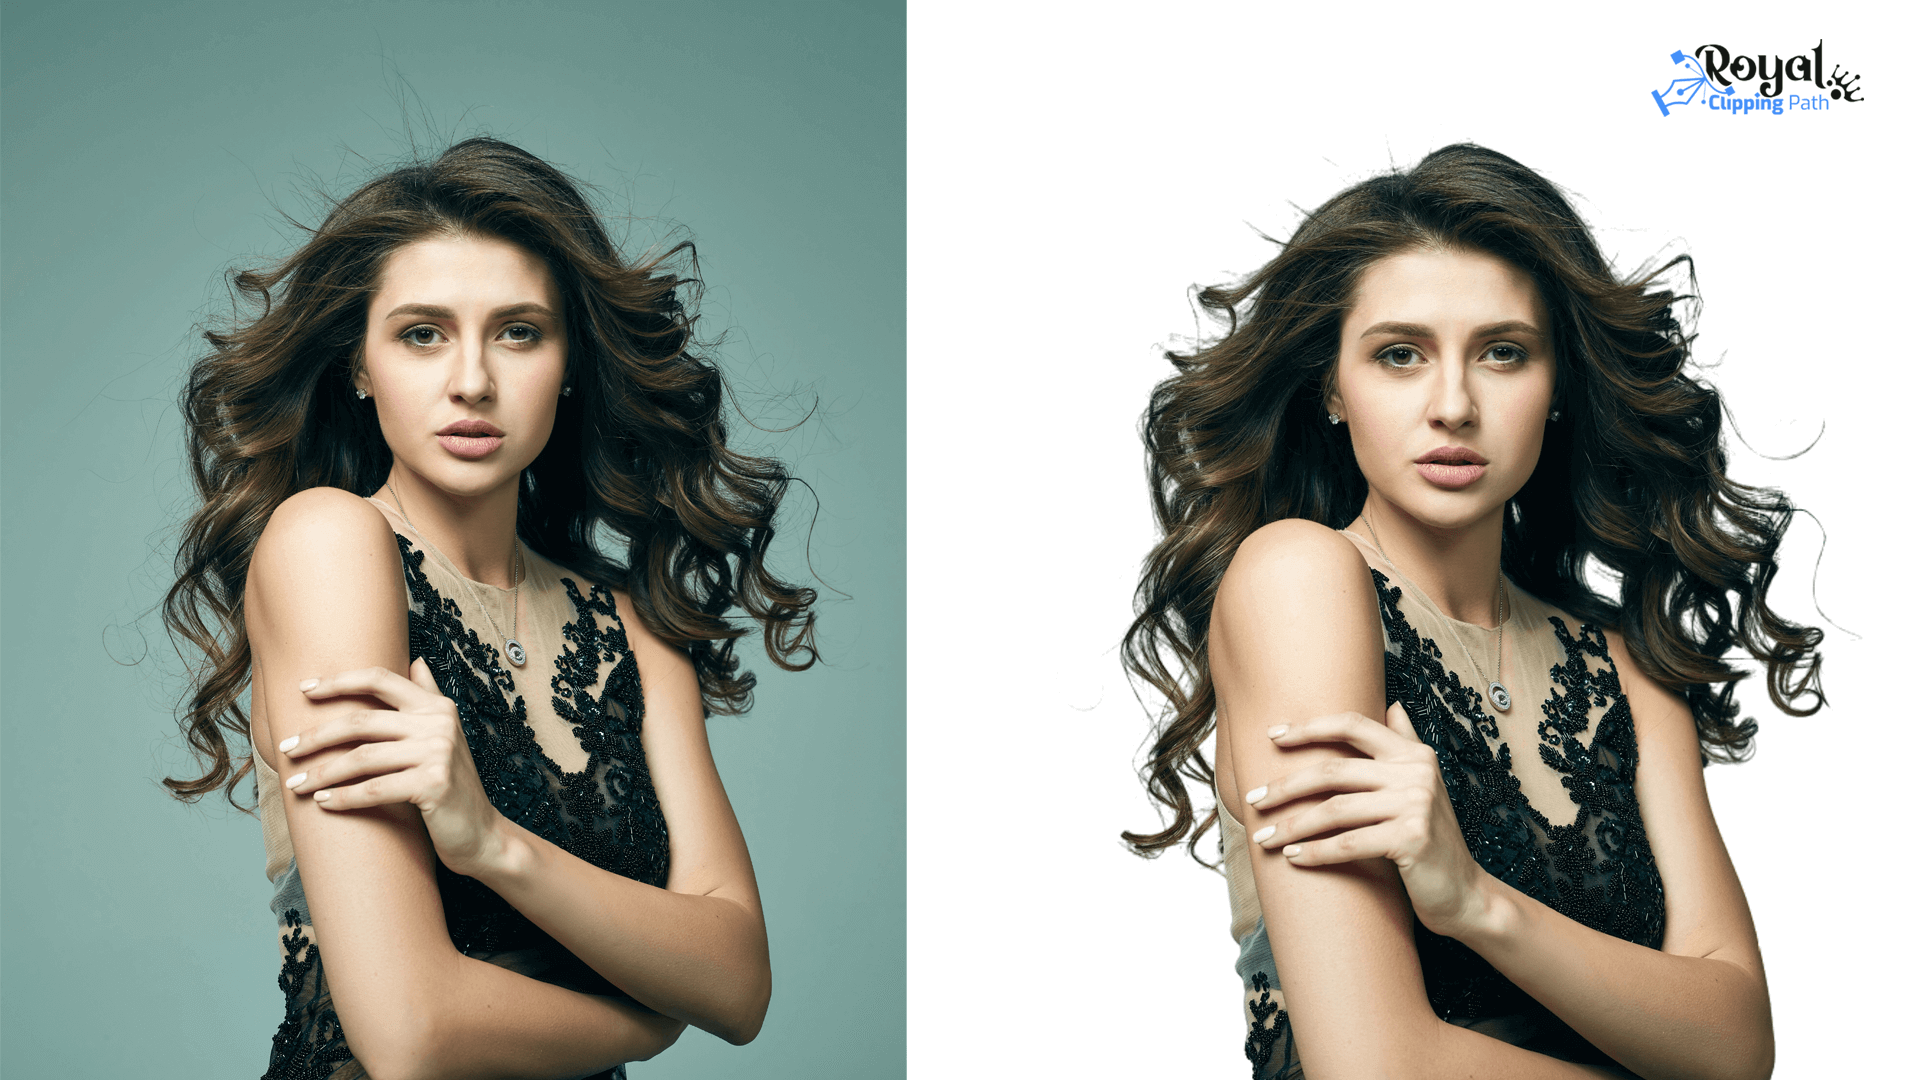
Masking in Photoshop works like a digital stencil. Imagine you have a piece of paper with some shapes cut out of it. When you place this paper over a picture, only the parts of the picture under the cut-out shapes are visible. In Photoshop, a mask does the same thing, letting you control which parts of a layer are visible or hidden. Image masking services use this technique to help you professionally edit photos, making it easier to remove backgrounds, blend images, and highlight specific areas for a polished, high-quality result.
Types of Masking in Photoshop
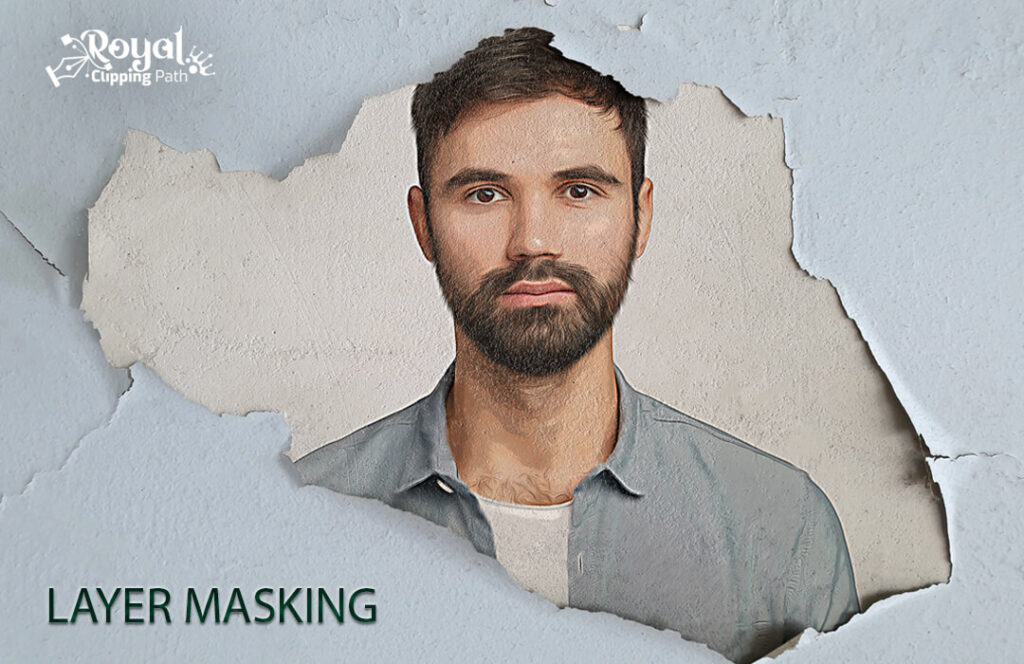
Layer Masking
Layer masking in Photoshop is an easy way to hide or show parts of an image without changing it permanently. Think of it like using a magic sheet to reveal or cover up specific parts of your picture. This technique is great for making detailed edits without changing the entire image. With layer masking, you can focus on editing just certain areas while keeping the rest of the picture safe. It’s like having a secret tool that lets you work precisely on the areas you want to change, leaving everything else untouched.
Layer masking is a powerful tool that lets you make changes to your image without worrying about messing up the original. For example, if you have a beautiful photo but want to change the color of a specific object, you can use layer masking to select that object and change its color without affecting the rest of the photo. It’s like having a magic wand that only changes what you want it to change.
Layer masking is also great for removing unwanted parts of your image. For instance, if you have a photo with a person in the background that you don’t want, you can use layer masking to select that person and remove them from the image, keeping the rest of the photo untouched. It’s like having a delete button that only deletes what you want to delete.
Layer masking is a versatile tool that can be used for many purposes. You can use it to blend images together, create special effects, and make complex selections. Every Photoshop user should know how to use it because it can save you a lot of time and effort when editing your images.
Vector Masking
Vector masking is a powerful tool used in graphic design and image editing. It’s a technique that allows designers to control which parts of an image or design element are visible and which are hidden. This is done using paths or shapes rather than pixel-based selections. Vector masks are essential for creating clean, scalable, and professional-looking designs.
Imagine you have a photo, and you want to cut out a part of it to use in your project. With vector masking, you can create a precise path around the area you want to keep. This path acts like a cookie cutter, showing only the part of the image inside the path and hiding everything outside it. The great thing about vector masks is that they can be edited at any time. You can adjust the path or shape to refine the masked area without losing any image quality.
Vector masks are created using vector graphics tools, such as Adobe Illustrator or the Pen Tool in Photoshop. These tools allow you to draw paths with great accuracy. Unlike raster images, which are made up of pixels, vector graphics use mathematical equations to create shapes. This means that vector masks can be resized without becoming blurry or losing detail.
One of the key benefits of using vector masks is their flexibility. Because they are not tied to the pixel grid, they can be scaled up or down as needed. This is particularly useful for projects that require different sizes of the same design, such as logos or icons.
In addition to resizing, vector masks make it easy to change the shape of the masked area. If you need to adjust the design, you can simply edit the path. This saves a lot of time compared to starting over with a new selection.
Vector masking is also helpful for creating complex compositions. For example, you can combine multiple vector masks to create intricate designs. Each mask can control a different part of the image, allowing for detailed and layered artwork.
In summary, vector masking is a crucial technique in graphic design and image editing. It allows for precise, scalable, and editable selections, making it an invaluable tool for designers. Whether you’re working on simple cutouts or complex compositions, vector masking helps you achieve professional results with ease.
Clipping masking
Clipping masking is a technique used in graphic design and image editing to create interesting effects and shapes. It helps you “cut out” a part of an image and use it as a template for another image or design. Here’s how clipping masking works in simple terms:
First, you need two layers. The first layer is the image or shape you want to use as the mask. The second layer is the image or design you want to apply the mask to.
- Select the Mask Layer: Choose the layer with the image or shape that will act as the mask. This could be anything, like a circle, a star, or an outline of an object.
- Define the Mask Area: Use a tool to outline the area of the mask you want to keep. This part of the image will stay visible, while the rest will be hidden.
- Apply the Mask: Once the mask is defined, apply it to the second layer. Only the parts of the second layer that fall within the mask will be visible. The rest will be hidden or “clipped.”
- Adjust as Needed: You can change the size, position, and rotation of the mask to get the effect you want. Try different shapes and images to create unique designs.
Clipping masking is powerful because it lets you combine images and shapes in creative ways. For example, you could use a photo of a flower as a mask to show a pattern or texture inside the flower’s petals. Or you could use a geometric shape as a mask to create an eye-catching abstract design.
One of the best things about clipping masking is that it’s easy to experiment with and adjust. You can try different shapes, images, and positions until you find something you love. If you don’t like the result, you can simply undo the mask and try again.
In summary, clipping masking is a simple but powerful technique that adds excitement and creativity to your graphic design projects. It allows you to create unique and eye-catching designs by combining images and shapes in new ways. Give clipping masking a try to make your designs stand out!
Alpha channel masking
Alpha channel masking in Photoshop is a simple way to make parts of an image see-through while keeping other parts visible. This technique uses shades of gray to control transparency: white areas are fully visible, black areas are hidden, and gray areas are partly see-through.
Here’s how to create an alpha channel mask:
- Select the Area: Use tools like the Magic Wand or Quick Selection Tool to choose the part of the image you want to keep visible.
- Save the Selection: In the Channels panel, save your selection as a new channel. This new channel is your alpha channel mask.
You can refine the mask by painting on it with black, white, or gray brushes. This lets you adjust which parts of the image are visible with precision. Alpha channel masking is especially useful for removing backgrounds around complex edges like hair or fur. It’s also great for adding special effects to specific parts of an image or blending multiple images smoothly.
The best part is that alpha channel masking is non-destructive. This means you can always go back and adjust the mask without changing the original image. This flexibility makes alpha channel masking an essential tool for anyone using Photoshop to enhance their images with detailed and precise edits.
Transparency Masking
Photoshop’s transparency masking feature helps users blur parts of an image while keeping other parts clear. To do this, you use a layer mask. A layer mask lets you choose which parts of the picture stay the same and which parts change. You can use simple tools like the Brush, Gradient, or Selection tools to make the mask.
Once you’ve created the mask, you can change how see-through it is and how smooth the edges are to make the picture look natural. Layer masks are very helpful for putting together detailed pictures. They let you remove unwanted backgrounds and hide or show certain parts of an image, making the final picture look more realistic.
To make a mask, go to the layer panel in Photoshop. From there, you can easily change the mask’s transparency and use other Photoshop tools to improve your image. This gives you better control over how your final picture looks.
You can check : Best Equipment For Product Photography
Tips for Effective Masking Images in Photoshop
Masking images in Photoshop can seem tricky, but with some simple steps, you can master it. Here are some easy-to-follow tips to help you create perfect masks for your images.
1. Understand the Basics
Masking in Photoshop allows you to hide or reveal parts of an image. Think of it like a stencil. The white areas in a mask reveal the image, while the black areas hide it. Gray areas show the image partially.
2. Choose the Right Tool
Photoshop offers different tools for masking. The most common are the Brush Tool, the Quick Selection Tool, and the Pen Tool. The Brush Tool is great for detailed work, the Quick Selection Tool is perfect for selecting areas quickly, and the Pen Tool is ideal for precise selections.
3. Use Layer Masks
Layer masks are the most flexible way to mask images. To add a layer mask, select your layer and click the “Add Layer Mask” button at the bottom of the Layers panel. This adds a white box next to your layer thumbnail. You can paint on this box to hide or reveal parts of the layer.
4. Work with Brushes
Using a soft brush can help create smooth transitions in your mask. To choose a soft brush, go to the Brush settings and adjust the hardness. A hardness of 0% gives a very soft edge, while 100% gives a hard edge. Use black to hide parts of the image, white to reveal, and gray for partial visibility.
5. Refine Your Selection
After creating your mask, you may need to refine it. Use the “Select and Mask” option from the menu to refine the edges. This tool helps you smooth, feather, and shift the edge of your selection to make it more accurate.
6. Zoom In for Detail
Zooming in on your image helps you work more precisely. Use the zoom tool or press “Ctrl” and “+” to zoom in. This is especially useful for masking fine details like hair or fur.
7. Use the Feather Option
Feathering softens the edges of your mask. You can find this option in the “Properties” panel when your mask is selected. Adjust the feathering to make the edges blend more naturally with the background.
8. Utilize the Quick Mask Mode
Quick Mask Mode allows you to paint over areas to create a selection. Press “Q” to enter Quick Mask Mode, then use a brush to paint the areas you want to select.
9. Practice Non-Destructive Editing
Using masks instead of erasing parts of your image keeps your work non-destructive. This means you can always go back and adjust the mask without losing any original data.
10. Experiment with Different Techniques
Different images require different masking techniques. Don’t be afraid to try out different tools and methods to see what works best for your project. The more you practice, the better you’ll become.
By following these simple tips, you can create effective masks in Photoshop. Remember to take your time and practice regularly to improve your skills. Happy masking!
Masking in Photoshop is a great way to make your images look better. By using masking, you can change the background and make your image clearer and more interesting. There are different types of masking in Photoshop, and all of them can be very useful for improving your photos.
This guide will help you understand how to use masking in Photoshop. It’s important to also understand how Photoshop’s layers work. Layers are like sheets of paper stacked on top of each other, and they help you organize and edit different parts of your image separately. When using masking, knowing how to work with white and black colors is crucial. In a mask, white areas show parts of the image, while black areas hide them.
Even though the basic idea of image masking is simple, getting really good at it takes a lot of practice. Masking gives you a lot of creative freedom, allowing you to blend images, remove backgrounds, and highlight specific parts of your photos. With time and practice, you can master this technique and make amazing images. Keep practicing, and good luck!